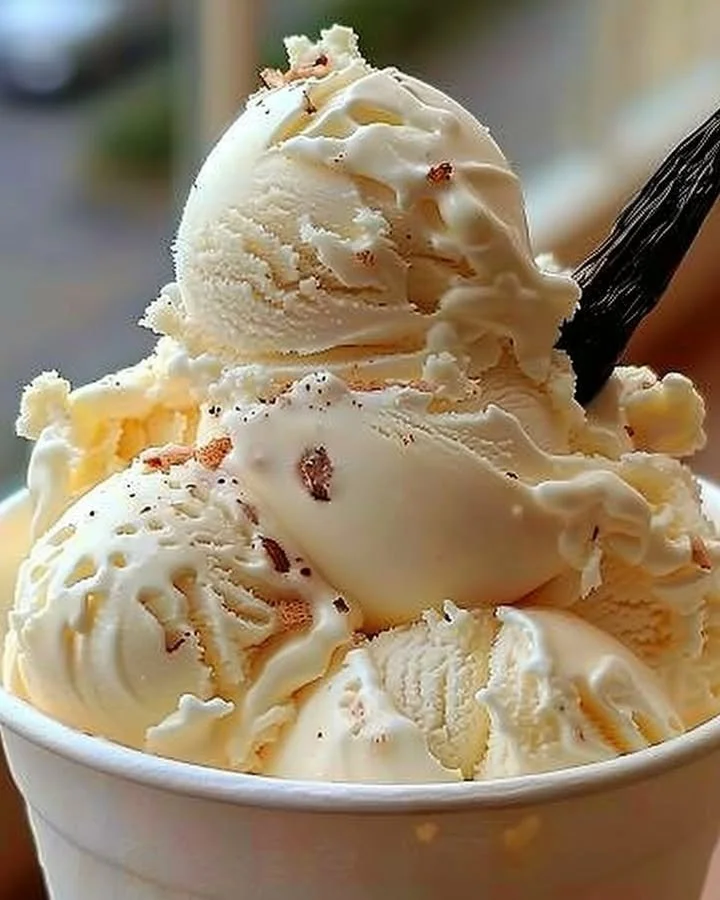
Homemade Vanilla Ice Cream evokes the comforting essence of summer and nostalgia, where each creamy scoop brings a sense of joy and indulgence. There’s nothing quite like the luxurious texture and rich flavor of vanilla ice cream made from scratch, especially when served on a warm day or as a delightful finish to a meal. This recipe invites you to craft a dessert that is both simple and rewarding. Follow along with this step-by-step guide to create your homemade treat that promises to be a crowd-pleaser.
When crafting your Homemade Vanilla Ice Cream, fresh, high-quality ingredients make all the difference. The combination of creamy heavy cream, rich whole milk, and sweet granulated sugar sets the stage for a velvety base. Using a vanilla bean infuses the mixture with an irresistible aroma and flavor. You’ll need 2 cups of heavy cream, 1 cup of whole milk, 3/4 cup of granulated sugar, either a vanilla bean or 2 teaspoons of pure vanilla extract, 4 large egg yolks, and a pinch of salt.
Let’s dive into the delightful step-by-step directions that will lead you to creamy perfection.

In a medium saucepan, combine the heavy cream, whole milk, and granulated sugar. Heat over medium heat until hot but not boiling, stirring occasionally. You’ll notice the sugar dissolving, creating a sweet, fragrant mixture that begins to warm the kitchen.
If using a vanilla bean, split it, scrape out the seeds, and add both the seeds and pod to the saucepan. This step releases those lovely vanilla notes into your cream. If using vanilla extract, you’ll add it later to preserve its full flavor.
In a separate bowl, whisk the egg yolks with a pinch of salt until they become pale and slightly thickened. This adds richness and depth to your ice cream.
Gradually pour a small amount of the hot milk mixture into the egg yolks, whisking constantly. This process, known as tempering, ensures that your egg yolks don’t scramble when combined with the hot mixture.
Add the remaining hot milk mixture to the yolks while whisking until fully combined. You’ll notice the mixture beginning to thicken and become creamier.
Pour the mixture back into the saucepan and cook over low heat, stirring constantly until thickened. This step helps create a custard base for your ice cream, giving it that luscious mouthfeel.
Strain the custard through a sieve into a bowl, removing the vanilla pod. Straining ensures a silky-smooth texture by getting rid of any lumps or particles.
Cool to room temperature, then refrigerate for at least 4 hours or overnight. Chilling allows the flavors to meld beautifully and leads to a smoother ice cream.
Churn in an ice cream maker according to the manufacturer instructions. This is where the magic happens, turning your creamy custard into soft, fluffy ice cream.
Transfer to an airtight container and freeze for at least 4 hours before serving. This final freeze allows the ice cream to firm up and reach the perfect scoopable consistency.
Tips & Tricks: For the best results, ensure all your ingredients are fresh. Experiment with additional flavorings, like chocolate chips or crushed fruit, during the churning process. If you don’t have an ice cream maker, pour the mixture into a shallow dish, freeze, and stir every 30 minutes until it’s evenly frozen.
Serving Suggestions & Pairings: Serve your Homemade Vanilla Ice Cream in bowls or cones, drizzled with chocolate sauce, or alongside warm brownies for a decadent dessert. It’s perfect for parties, family gatherings, or as a refreshing treat after dinner.
Nutritional Information: One serving of Homemade Vanilla Ice Cream (approximately 1/2 cup) contains around 210 calories, with 15g of fat, 22g of carbohydrates, and 3g of protein. Enjoy this treat in moderation as part of a balanced diet.
Storing Tips & Variations: Store your ice cream in an airtight container in the freezer for up to two weeks. To maintain its texture, minimize air exposure by pressing plastic wrap against the surface. For variations, consider adding crushed cookies, nuts, or swirls of fruit puree to the churned mixture.
This Homemade Vanilla Ice Cream is a treat that everyone should try at least once! Its simple ingredients and easy preparation make it a family-friendly recipe that’s perfect for every occasion. Share your experience with friends and family; they will surely thank you for this delightful taste of nostalgia.
FAQs:
Can I use milk instead of heavy cream?
While you can use milk, heavy cream is essential for the rich and creamy texture characteristic of traditional ice cream.What’s the difference between using a vanilla bean and vanilla extract?
Vanilla beans provide a more intense, natural flavor, while vanilla extract is convenient and still delicious. Using both would yield a richer flavor profile.How long should I churn the ice cream?
Churning time varies by machine, but typically 20-30 minutes should suffice until the ice cream reaches a soft-serve consistency.Can I make this ice cream without an ice cream maker?
Yes, you can mix the ingredients and pour them into a shallow container, freezing and stirring every 30 minutes until firm.How do I know when the custard is thick enough?
You can test it by running your finger along the back of a spoon; if it leaves a path that holds, you’re ready to continue with the recipe!
Enjoy creating your Homemade Vanilla Ice Cream, and don’t forget to share your creative twists on this classic treat!