

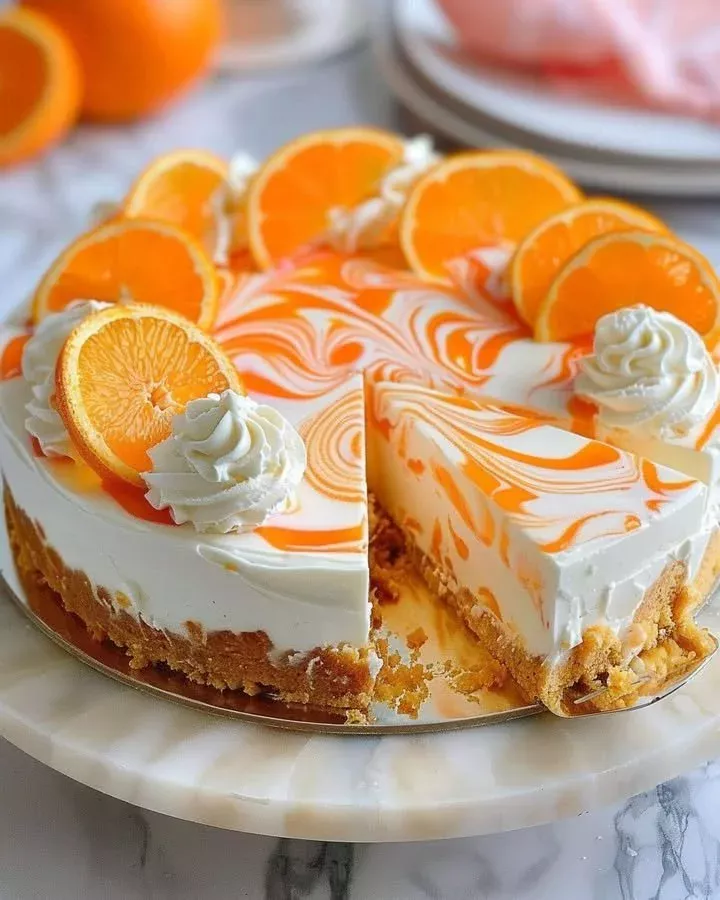
No-Bake Orange Creamsicle Cheesecake is a delightful blend of creamy textures and citrusy flavors, evoking the nostalgia of summer days spent savoring orange creamsicle popsicles. This recipe is the perfect way to indulge your sweet tooth without the hassle of baking, making it a fantastic go-to dessert for gatherings or family dinners. With its rich layers of fluffy cream cheese and vibrant orange, it’s a comforting dessert that everyone will love. Follow this step-by-step guide to create an unforgettable treat that will leave your taste buds dancing!
Ingredients
To make this luscious No-Bake Orange Creamsicle Cheesecake, you will need the following ingredients:
- 1 1/2 cups graham cracker crumbs: These crumbs provide a crumbly, buttery base that holds the cheesecake together.
- 1/4 cup sugar: This will sweeten the crust perfectly.
- 1/2 cup unsalted butter, melted: The melted butter binds the crumbs together, creating a rich foundation for the cheesecake.
- 16 oz cream cheese, softened: This forms the creamy filling, offering a rich texture that melts in your mouth.
- 1 cup heavy cream: When whipped, it adds airy lightness to the cheesecake.
- 1/2 cup powdered sugar: This sweetens the filling and helps create a smooth consistency.
- 1 teaspoon vanilla extract: It infuses the filling with a warm, aromatic flavor.
- 1/4 cup fresh orange juice: This natural sweetness and zing brings the flavor of the oranges to life.
- 1 tablespoon orange zest: This adds an aromatic citrus punch, enhancing the overall flavor.
- 1/4 cup orange gelatin (Jell-O): It helps to set the cheesecake, contributing to its unique texture.
- 1 teaspoon orange extract: For an added burst of orange flavor, this ingredient ties everything together.
These simple yet vibrant ingredients come together to create a No-Bake Orange Creamsicle Cheesecake that is sure to be a hit!
Cooking Time & Tips For No-Bake Orange Creamsicle Cheesecake
Making No-Bake Orange Creamsicle Cheesecake can be divided into two types of preparation: quick and slow. Quick preparation involves making the cheesecake in the same day, while a slow approach might include preparing the crust and the filling separately. The latter can enhance the flavors, especially the zest and citrus notes.
To ensure your cheesecake turns out perfectly, here are some practical tips:
- Use room temperature cream cheese for a smoother filling.
- Whip your heavy cream until stiff peaks form for a light texture.
- Allow the cheesecake to chill for at least 4 hours; overnight is best for a firmer consistency.
- Don’t skip the orange zest, as it adds a wonderfully fragrant touch.
Step-by-Step Directions

In a medium bowl, combine the graham cracker crumbs and sugar. The sweet scent of the crumbs and sugar mingling will instantly make you feel at home. Stir in the melted butter until the mixture resembles wet sand. Press it firmly into the bottom of a 9-inch springform pan and chill for at least 30 minutes. This chilling time is crucial, as it allows the crust to set and provides a solid foundation for your cheesecake.
While the crust is chilling, prepare the creamy filling. Beat the softened cream cheese in a large bowl until smooth and creamy, reminiscent of fluffy clouds. Add the powdered sugar and vanilla extract, mixing until fully combined. The sweetness of the sugar will perfectly balance the tanginess of the cream cheese.
In another bowl, whip the heavy cream until stiff peaks form. This step adds an airy element to your cheesecake, making each bite feel light and fluffy. Carefully fold the whipped cream into the cream cheese mixture, ensuring you maintain the airy texture.
Now, it’s time to infuse that delightful orange flavor. Add the fresh orange juice, orange zest, orange gelatin, and orange extract to the mixture, gently folding until everything is well incorporated. The bright, citrusy aroma is sure to fill your kitchen and excite your senses!
Once your cheesecake filling is ready, pour it onto the chilled crust, smoothing the top with a spatula. Refrigerate for at least 4 hours, but let it set overnight for the best results. The waiting might be tough, but it’ll be worth it when you taste the final product!
When you’re ready to serve, garnish with additional orange zest or a dollop of whipped cream for an elegant finish. The vibrant orange color and creamy texture make this cheesecake an eye-catching dessert!
Serving Suggestions & Occasions
No-Bake Orange Creamsicle Cheesecake serves beautifully as a summer dessert at BBQs or picnics. It’s also an ideal treat for birthday parties, family gatherings, or even a cozy night in with loved ones. Pair it with a refreshing glass of iced tea or lemonade to enhance the citrus flavors. Consider adding slices of fresh oranges or a berry garnish for a pop of color and flavor.
Common Mistakes For No-Bake Orange Creamsicle Cheesecake
One common mistake is not allowing the cream cheese to soften to room temperature; this leads to a lumpy filling. Another error is over-whipping the heavy cream, which can make it grainy instead of light and fluffy. Additionally, rushing the chilling process can cause the cheesecake to not set properly. Always remember to give it enough time to firm up in the refrigerator!
Healthier Alternatives & Variations
For a healthier twist, consider replacing graham cracker crumbs with almond flour for a gluten-free option. You can also use Greek yogurt instead of cream cheese for a lighter filling. If you’re aiming for lower sugar, reduce the amount of powdered sugar or experiment with a sugar substitute that suits your taste. For a tropical twist, add crushed pineapple or coconut flakes to the filling!
FAQs
Can I make this cheesecake dairy-free?
Yes! Substitute cream cheese with a dairy-free alternative and use coconut cream for the whipped cream.How long can the cheesecake stay in the fridge?
It can be stored in the refrigerator for about 3-5 days.Can I freeze this cheesecake?
Absolutely! However, it’s best enjoyed fresh. If freezing, ensure it’s well wrapped, and thaw it overnight in the fridge before serving.What can I use in place of confectioners’ sugar?
You can use granulated sugar, although the texture might differ slightly.Is there an alternative for orange gelatin?
You can use unflavored gelatin if you want to avoid artificial colors and flavors.How do I know when my cheesecake is set?
When the edges are firm and the center jiggles slightly, it’s ready.
Conclusion
Tempted to create your very own No-Bake Orange Creamsicle Cheesecake? With its exquisite flavors and simple preparation steps, this dessert promises to delight your family and friends. Don’t wait any longer; get started today and enjoy a luscious slice of nostalgia that will leave you craving more!

No-Bake Orange Creamsicle Cheesecake
Ingredients
Crust Ingredients
- 1.5 cups graham cracker crumbs Provides a crumbly base
- 0.25 cups sugar Sweetens the crust
- 0.5 cups unsalted butter, melted Binds the crumbs together
Filling Ingredients
- 16 oz cream cheese, softened Forms creamy filling
- 1 cups heavy cream Adds airy lightness when whipped
- 0.5 cups powdered sugar Sweetens the filling
- 1 teaspoon vanilla extract Infuses flavor
- 0.25 cups fresh orange juice Adds natural sweetness
- 1 tablespoon orange zest Enhances flavor
- 0.25 cups orange gelatin (Jell-O) Helps set the cheesecake
- 1 teaspoon orange extract Ties flavors together
Instructions
Preparation of Crust
- In a medium bowl, combine the graham cracker crumbs and sugar. Stir in the melted butter until the mixture resembles wet sand.
- Press it firmly into the bottom of a 9-inch springform pan and chill for at least 30 minutes.
Preparation of Filling
- Beat the softened cream cheese in a large bowl until smooth and creamy.
- Add the powdered sugar and vanilla extract, mixing until fully combined.
- In another bowl, whip the heavy cream until stiff peaks form.
- Fold the whipped cream into the cream cheese mixture, maintaining the airy texture.
- Add the fresh orange juice, orange zest, orange gelatin, and orange extract to the mixture.
- Gently fold until well incorporated.
Assembly
- Pour the cheesecake filling onto the chilled crust, smoothing the top with a spatula.
- Refrigerate for at least 4 hours, but overnight is best for a firmer consistency.
Serving
- Garnish with additional orange zest or a dollop of whipped cream before serving.