
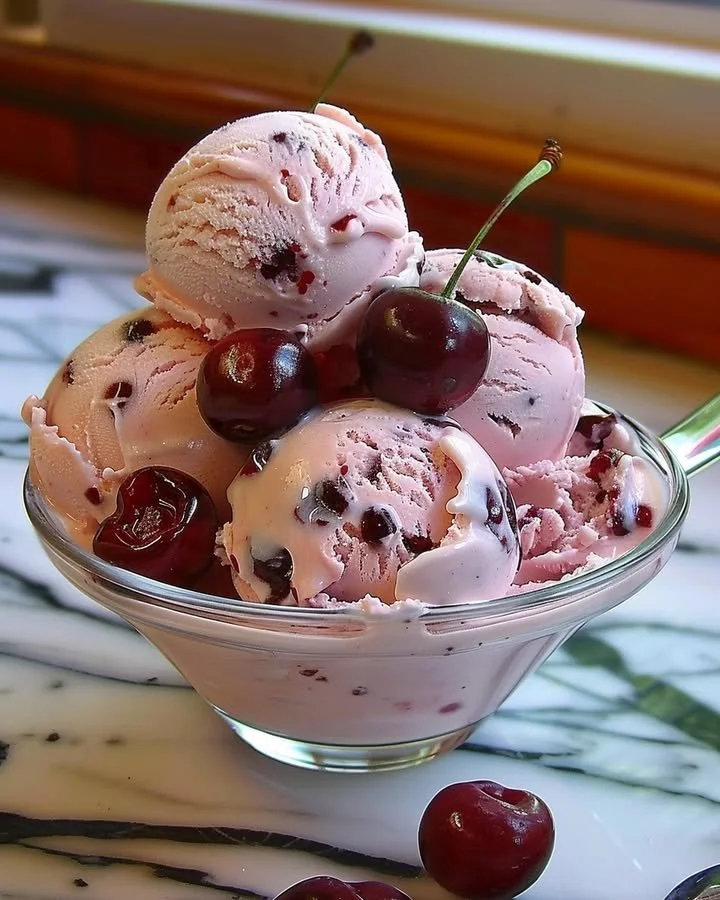
Homemade Cherry Ice Cream is an irresistible dessert that combines the sweet tartness of ripe cherries with the creamy richness of dairy. This delightful treat evokes nostalgic memories of summers spent under the sun, when the air was filled with laughter and the taste of homemade delights. It’s not just a dessert; it’s a comforting hug in a bowl, perfect for sharing with family or enjoying on a quiet evening. With its simple ingredients and straightforward preparation, this recipe is the ideal way to indulge your sweet tooth while also getting a dose of fresh fruit. Let’s dive into this easy, step-by-step homemade cherry ice cream recipe that you’ll want to make again and again!
Ingredients
To create your own luscious Homemade Cherry Ice Cream, you will need the following ingredients, bursting with vibrant flavors and aromas:
- 2 cups ripe cherries: These should be freshly picked, sweet, and perfectly tender, adding a juicy burst of flavor.
- 1 cup heavy cream: The rich creaminess serves as the base for your ice cream, creating a luxurious texture.
- 1 cup whole milk: This adds a smooth, velvety quality and helps balance the creaminess.
- 3/4 cup granulated sugar: For the perfect amount of sweetness, dissolving beautifully into your mixture.
- 1 teaspoon vanilla extract: Introducing an aromatic and warm depth of flavor.
- A pinch of salt: This enhances the sweetness of the cherries and balances the flavors beautifully.
This recipe is entirely halal and strikes the perfect balance between sweetness and flavor.
Cooking Time & Tips For Homemade Cherry Ice Cream
When it comes to preparing Homemade Cherry Ice Cream, you can opt for either a quick or slow preparation method. A shorter prep time works well if you’re looking for instant gratification, while a slower approach allows the flavors to develop more fully. Regardless of your choice, practicality is key!
Practical Tips for Success:
- Choose Quality Cherries: Fresh, ripe cherries yield the best flavor. Look for cherries that are firm and free of blemishes.
- Chill Your Ingredients: Using chilled cream and milk helps the ice cream churn better and achieve a smoother texture.
- Don’t Rush the Freezing: Allow your ice cream sufficient time to freeze after churning so that it reaches the perfect consistency.
Step-by-Step Directions

Macerate the Cherries: Start by tossing the pitted and halved cherries with 1/4 cup of sugar in a medium bowl. Let them sit for 30 minutes. This process softens the cherries and enhances their natural sweetness.
Prepare the Cream Mixture: In a separate bowl, whisk together the heavy cream, whole milk, the remaining sugar, vanilla extract, and a pinch of salt. Continue whisking until the sugar is fully dissolved into this creamy, rich mixture.
Combine Cherry and Cream Mixtures: Next, gently fold the cherry mixture into the cream mixture. Stir carefully until everything is fully combined and you see ribbons of cherry peeking through the creamy base.
Churn in the Ice Cream Maker: Pour the mixture into your ice cream maker and churn according to the manufacturer’s instructions. You’ll want to churn until the mixture reaches a soft-serve consistency, which takes about 20-25 minutes, depending on your machine.
Freeze Until Firm: Transfer the soft ice cream to a lidded container and freeze for at least 4 hours until it’s firm enough to scoop.
Serve and Enjoy: When you’re ready, scoop your Homemade Cherry Ice Cream into bowls or cones. Enjoy the refreshing, creamy delight on a warm day!
Serving Suggestions & Occasions
Homemade Cherry Ice Cream is versatile enough to serve on various occasions. It’s perfect for family gatherings, summer barbecues, or simply enjoying after a long day. Consider pairing it with a slice of warm pie, drizzling it with chocolate sauce, or topping it with crushed nuts for added texture. It also makes an excellent filling for ice cream sandwiches!
Common Mistakes For Homemade Cherry Ice Cream
To ensure your cherry ice cream turns out perfectly, avoid these common mistakes:
- Using Overripe or Underripe Cherries: Ensure your cherries are perfectly ripe for the best flavor and texture.
- Not Chilling Ingredients: Skipping the chilling step can lead to a grainy texture in your ice cream.
- Churning for Too Long or Too Short: Proper timing in the churn is crucial for achieving the right consistency.
- Skipping the Freezing Time: Don’t serve your ice cream immediately after churning; it needs time to firm up in the freezer.
Healthier Alternatives & Variations
If you’re looking for healthier alternatives, consider these adjustments:
- Use Greek Yogurt: Replace some or all of the cream with Greek yogurt for a tangy twist and lower fat content.
- Sweeten Naturally: Opt for honey or maple syrup instead of granulated sugar for a different flavor profile.
- Add Other Fruits: Mix in berries, peaches, or nuts for a new take on the classic cherry flavor.
FAQs
1. Can I use frozen cherries instead of fresh?
Yes! Just thaw them and drain excess liquid before using.
2. How long does homemade ice cream last?
If stored properly in an airtight container, it can last up to two weeks in the freezer.
3. Do I need an ice cream maker?
An ice cream maker is recommended for the best texture, but you can also blend the ingredients and freeze them, stirring every 30 minutes for a few hours.
4. What if my ice cream is too hard after freezing?
Let it sit at room temperature for about 10 minutes before scooping to soften.
5. Can I add chocolate chips or other mix-ins?
Absolutely! Stir in your favorite mix-ins during the last few minutes of churning.
6. How can I make this recipe dairy-free?
Replace the cream and milk with coconut cream and almond milk for a delicious dairy-free alternative.
Conclusion
Indulging in Homemade Cherry Ice Cream is an adventure that combines fresh ingredients and flavors into a blissful treat. Whether it’s a hot summer day or a cozy evening at home, this ice cream brings joy and a smile to the table. So why wait? Gather your ingredients, roll up your sleeves, and create this delicious frozen delight today! You won’t regret it, and your taste buds will thank you!

Homemade Cherry Ice Cream
Ingredients
Main Ingredients
- 2 cups ripe cherries Freshly picked, sweet, and perfectly tender.
- 1 cup heavy cream Creates a luxurious texture.
- 1 cup whole milk Adds smoothness and balances creaminess.
- 3/4 cup granulated sugar For the perfect amount of sweetness.
- 1 teaspoon vanilla extract Imparts aromatic depth of flavor.
- a pinch salt Enhances the sweetness of the cherries.
Instructions
Preparation
- Macerate the Cherries: Toss the pitted and halved cherries with 1/4 cup of sugar in a medium bowl. Let them sit for 30 minutes.
- Prepare the Cream Mixture: In a separate bowl, whisk together the heavy cream, whole milk, the remaining sugar, vanilla extract, and a pinch of salt until sugar is fully dissolved.
- Combine Cherry and Cream Mixtures: Gently fold the cherry mixture into the cream mixture until fully combined.
Churning
- Pour the mixture into your ice cream maker and churn according to the manufacturer’s instructions until it reaches soft-serve consistency.
- Transfer the soft ice cream to a lidded container and freeze for at least 4 hours until firm.
Serving
- Scoop your Homemade Cherry Ice Cream into bowls or cones and enjoy!