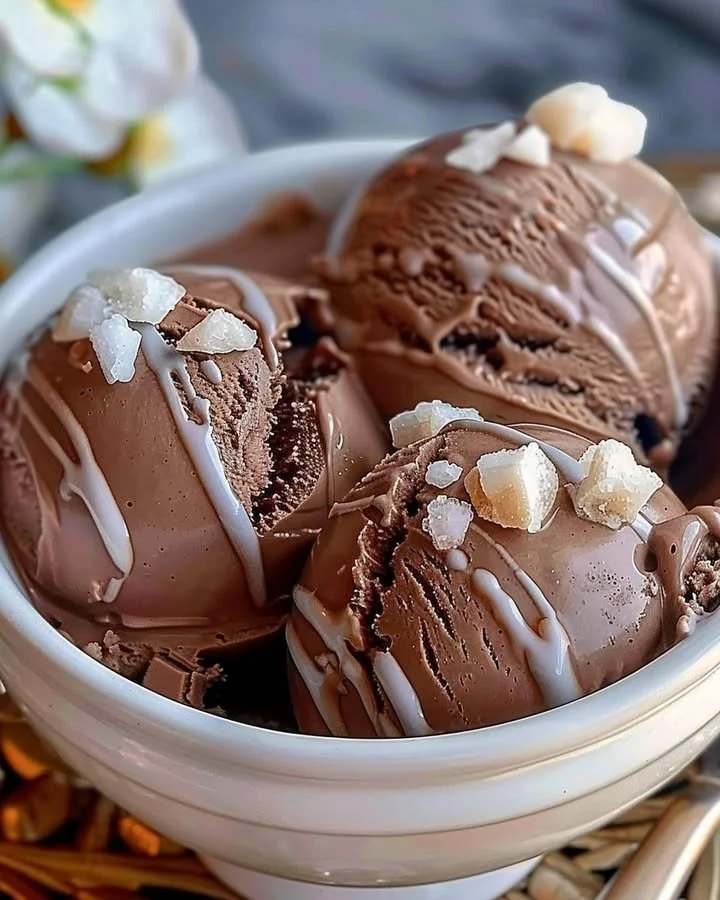
Homemade Chocolate Ice Cream is a delightful treat that evokes memories of childhood summers spent lounging outdoors with a creamy cone in hand. This indulgent yet simple recipe brings together rich chocolatey goodness and a luxuriously creamy texture, making it a family favorite. Whether you’re looking for a comforting dessert to beat the heat or a sweet addition to a special occasion, Homemade Chocolate Ice Cream delivers it all in a few easy steps. Follow this step-by-step guide to create a delectable dessert that will surely impress friends and family alike.
Ingredients
To whip up this dreamy Homemade Chocolate Ice Cream, you will need:
- 2 cups heavy cream: This will give your ice cream its luxurious, creamy texture.
- 1 cup whole milk: Adding whole milk balances the richness, creating a perfect blend.
- 3/4 cup granulated sugar: Sweetness is key; the sugar will dissolve beautifully into the mixture.
- 1/2 cup unsweetened cocoa powder: For that deep chocolate flavor, cocoa powder is a must.
- 1 teaspoon vanilla extract: A splash of vanilla enhances the overall flavors perfectly.
- A pinch of salt: Elevates all the flavors, making them more pronounced.
These ingredients combine harmoniously to create an irresistibly creamy treat that’s perfect for any occasion.
Step-by-Step Directions
To make your Homemade Chocolate Ice Cream, follow these easy steps for success:
Mix the Base: In a large mixing bowl, combine 2 cups of heavy cream, 1 cup of whole milk, and 3/4 cup of granulated sugar. Whisk vigorously until the sugar has completely dissolved, ensuring a smooth base.
Incorporate Flavor: Add in 1/2 cup of unsweetened cocoa powder, 1 teaspoon of vanilla extract, and a pinch of salt. Whisk until the mixture is smooth and chocolatey, with no lumps remaining.
Churn the Mixture: Pour the combined mixture into your ice cream maker. Churn according to the manufacturer’s instructions until it reaches a soft-serve consistency, which usually takes around 20-30 minutes.
Freeze for Firmness: Transfer the churned ice cream into an airtight container, smoothing the top with a spatula. Freeze for at least 4 hours to firm up properly before serving.
Serve and Enjoy: Once firm, scoop into bowls or cones. Top with your favorite toppings, and enjoy this creamy delight!
Tips & Tricks
- Allow the heavy cream and milk to sit at room temperature for about 10 minutes before mixing to help dissolve the sugar more smoothly.
- For a more intense chocolate flavor, consider adding a tablespoon of chocolate syrup into the mixture.
- If you don’t have an ice cream maker, you can pour the mixture into a shallow dish and stir every 30 minutes for the first few hours to break up ice crystals.
Serving Suggestions & Pairings
Homemade Chocolate Ice Cream is versatile and can be served in various delightful ways. Present it in elegant bowls with a sprig of mint on top for a fancy dessert, or simply in waffle cones for casual enjoyment by the pool. Pair it with warm brownies or chocolate cake for an indulgent dessert experience. It’s perfect for birthday parties, summer barbecues, or just a cozy evening at home.
Nutritional Information
A serving of Homemade Chocolate Ice Cream (about 1/2 cup) contains approximately:
- Calories: 300 kcal
- Total Fat: 20 g
- Saturated Fat: 12 g
- Carbohydrates: 27 g
- Sugar: 24 g
- Protein: 4 g
Enjoying this treat is all about balance; indulge in moderation and savor each delightful bite.
Storing Tips & Variations
To store your Homemade Chocolate Ice Cream, keep it in an airtight container to prevent freezer burn. Make sure it’s frozen for at least 4 hours before serving, and it can be stored for up to 2 weeks in the freezer.
If you’re feeling adventurous, there are various variations to explore. Try adding crushed cookies or chocolate chips for texture, or swirl in some peanut butter or caramel for added flavor. You could even experiment with different types of milk, like almond or oat milk, for a dairy-free version.
Conclusion
Homemade Chocolate Ice Cream is not just a dessert; it’s an experience filled with rich flavors and delightful textures. By following this simple recipe, you can create a creamy treat that brings joy to any gathering. We encourage you to try making this delicious ice cream at home and share your experience with friends and family.
FAQs
1. Can I make this recipe without an ice cream maker?
Yes, you can! Simply place the mixed ingredients in a shallow dish and stir every 30 minutes for the first few hours until it’s creamy.
2. How long does Homemade Chocolate Ice Cream last in the freezer?
When stored in an airtight container, it can last up to 2 weeks in the freezer.
3. Can I use low-fat milk instead of whole milk?
Using low-fat milk will result in a less creamy texture but can still work if you’re looking to cut calories.
4. What toppings can I add to my chocolate ice cream?
Consider adding nuts, sprinkles, chocolate syrup, or fresh fruits like strawberries or bananas for an extra touch.
5. Is it possible to make this recipe vegan?
Yes! Substitute the heavy cream and whole milk with coconut cream or plant-based alternatives, and ensure that your sugar is organic or vegan-friendly.
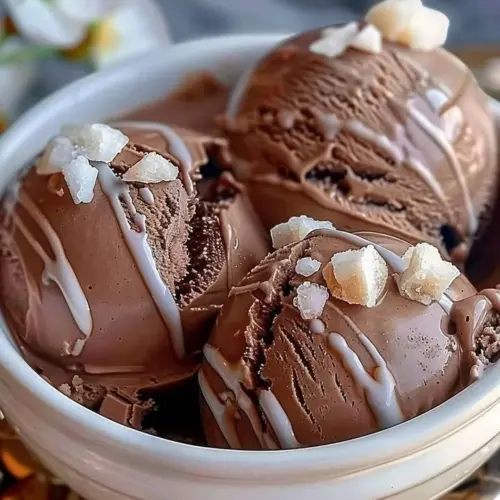
Homemade Chocolate Ice Cream
Ingredients
Base Ingredients
- 2 cups heavy cream This will give your ice cream its luxurious, creamy texture.
- 1 cup whole milk Adding whole milk balances the richness, creating a perfect blend.
- 3/4 cup granulated sugar Sweetness is key; the sugar will dissolve beautifully into the mixture.
- 1/2 cup unsweetened cocoa powder For that deep chocolate flavor, cocoa powder is a must.
- 1 teaspoon vanilla extract A splash of vanilla enhances the overall flavors perfectly.
- 1 pinch salt Elevates all the flavors, making them more pronounced.
Instructions
Preparation
- In a large mixing bowl, combine the heavy cream, whole milk, and granulated sugar. Whisk vigorously until the sugar has completely dissolved.
- Add in the unsweetened cocoa powder, vanilla extract, and a pinch of salt. Whisk until the mixture is smooth and chocolatey, with no lumps remaining.
Churning
- Pour the combined mixture into your ice cream maker. Churn according to the manufacturer’s instructions until it reaches a soft-serve consistency, which usually takes around 20-30 minutes.
Freezing
- Transfer the churned ice cream into an airtight container, smoothing the top with a spatula. Freeze for at least 4 hours to firm up properly before serving.
Serving
- Once firm, scoop into bowls or cones. Top with your favorite toppings, and enjoy this creamy delight!